Starting a blog is one of the best ways to share your knowledge, express your creativity, and even make money online. Whether you want to write about personal experiences, business tips, or hobbies, blogging offers an excellent platform to reach a global audience. In this post, I will provide a step-by-step guide on how to start a blog with your smartphone.
1. What is a Blog?
A blog is a type of website or a section of a website where an individual or group regularly publishes written content, known as posts, on topics of interest. These posts are typically displayed in reverse chronological order, with the newest appearing first. Blogs can cover any subject, such as personal experiences, news, education, reviews, or business updates, and often allow readers to leave comments, creating interaction between the writer and the audience.
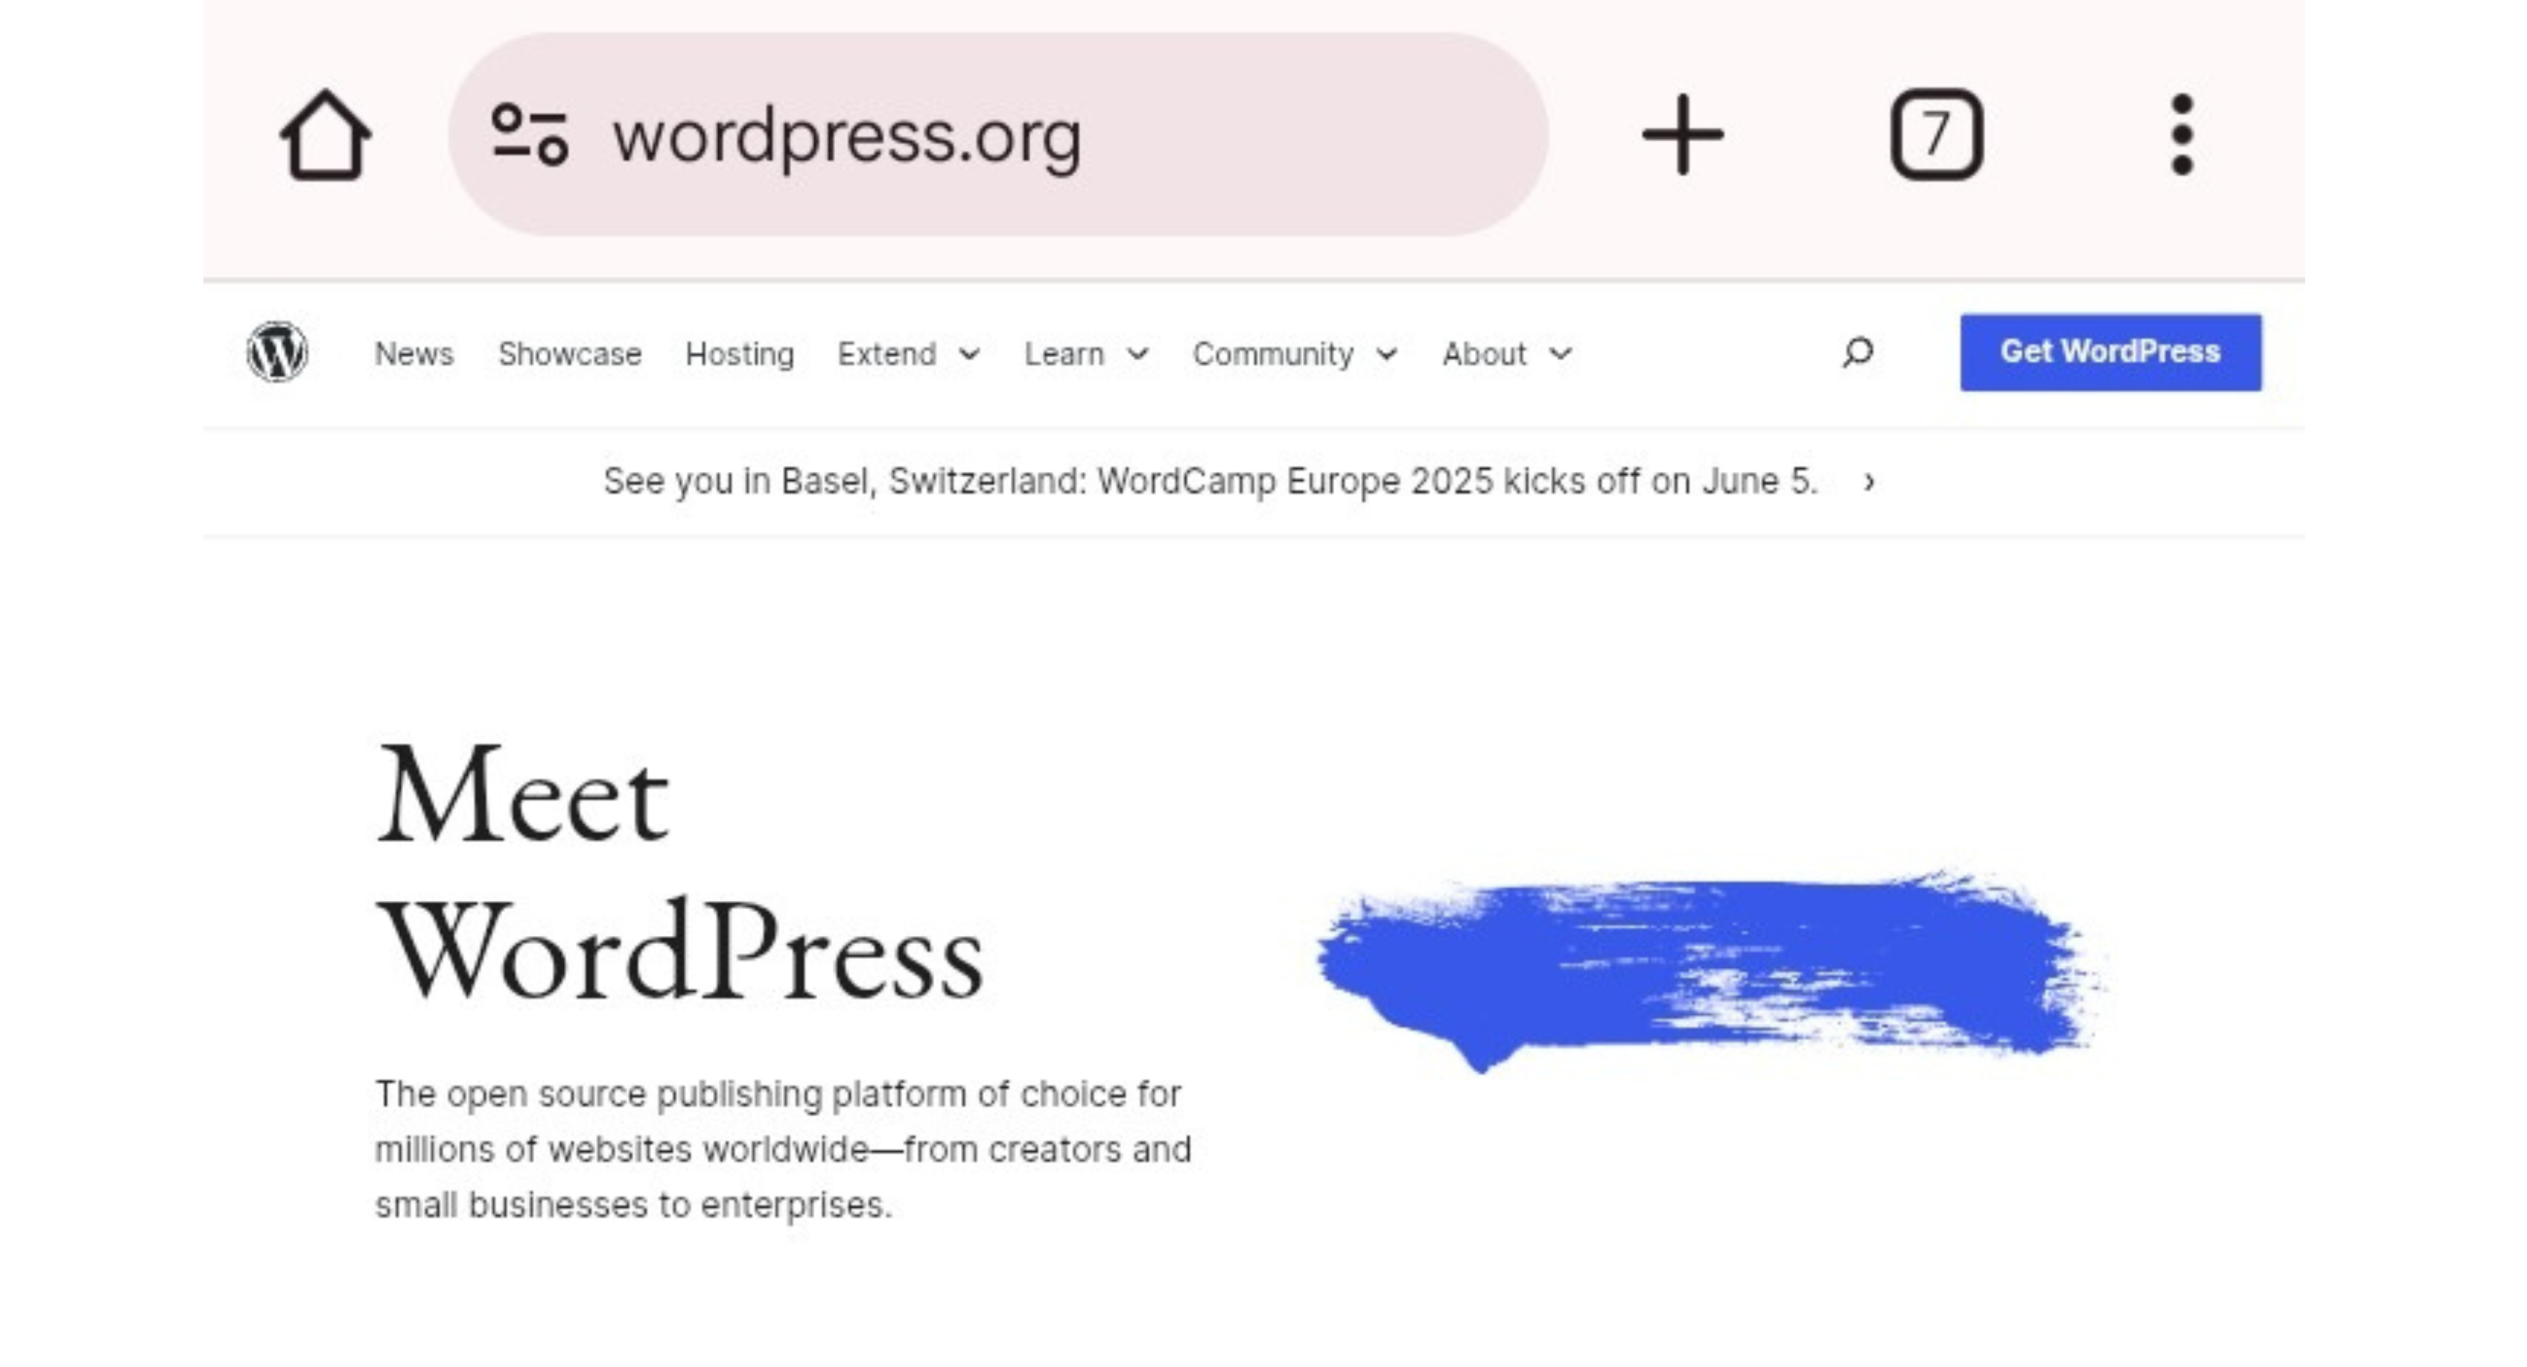
WordPress is one of the most popular blogging platforms. WordPress has two versions: .org and .com. Both options will meet your needs, but it’s crucial to recognise their distinctions. WordPress.com is a fully hosted platform that handles hosting, upkeep, and security, making it simpler for beginners. However, unless you purchase a premium plan, there aren’t many customisation or revenue-generating options available.
WordPress.org, on the other hand, is a self-hosted version of WordPress where you download and install the software on your own hosting. This gives you complete control over your website, allowing you to install any plugin, alter the code, and make money as you see fit. WordPress.org is better for serious bloggers, businesses, and people who want complete control and flexibility, while WordPress.com is best for easy, hassle-free blogging.
How To Start A Blog With Your Smartphone (Step-by-Step)
Generally, to successfully create a blog, It is critical to establish goals, define who you want to appeal to, and pay attention to more technical details. These include selecting the appropriate host, selecting a reputable platform, and incorporating all of the moving pieces required to support your efforts.
Choose your niche
The first step to take is to choose a niche. A niche is a specific segment or focused area within a larger market or topic. It’s like choosing a particular “corner” of a broader subject. A niche helps you stand out by targeting a specific audience with specific needs, instead of trying to appeal to everyone.
Choose a Domain for Your Blog
Make sure the domain name you choose for your blog is short, straightforward, and memorable. To aid with SEO, pick a domain name that reflects your blog’s niche or concentration, stays away from hyphens and digits, and, if at all possible, include pertinent keywords. For consistent branding, use a name that is simple, easy to spell, and available. If possible, use a.com domain. Make sure the social media handles match the name.
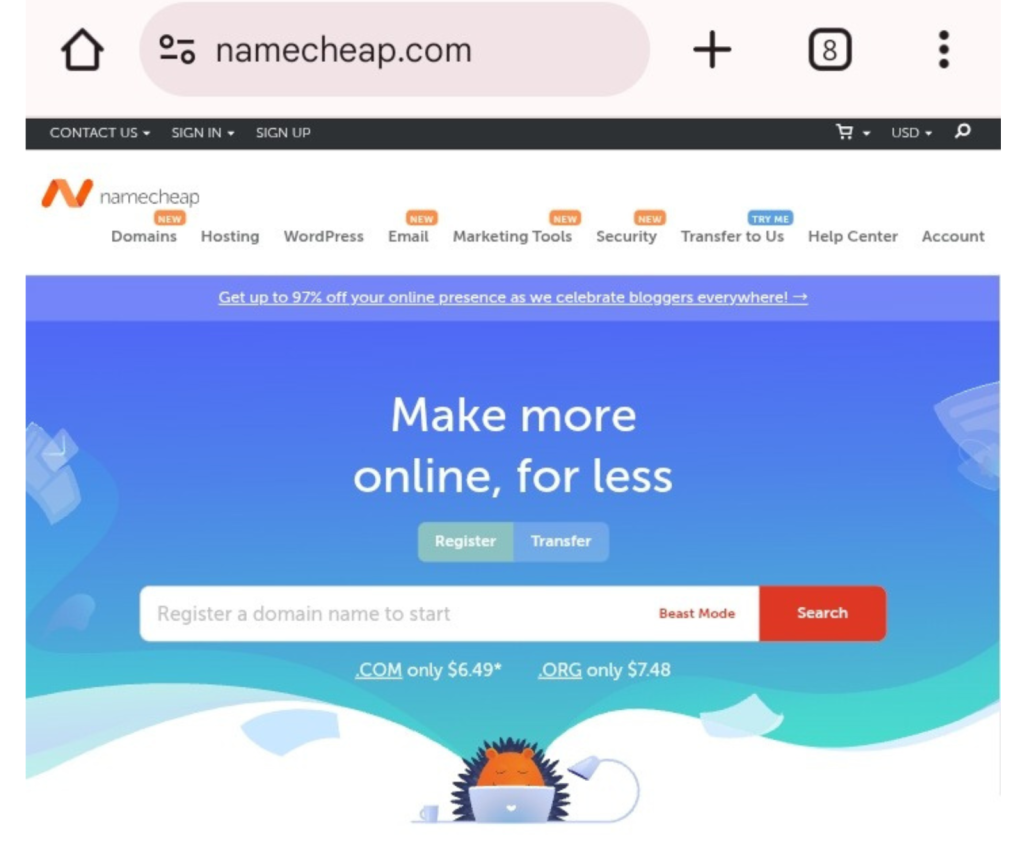
I will recommend using Namecheap to check availability of your domain name. You should use Namecheap because it’s a reliable and affordable domain registrar that offers competitive pricing, free WHOIS privacy protection, and easy domain management. It’s beginner-friendly, provides good customer support, and often includes free extras like email forwarding and DNS management. Namecheap is also known for its transparent pricing without hidden fees, making it a solid choice for bloggers and small business owners.
Choose your Hosting Plan (EasyWP)
Once you have your domain, the next step is to choose a hosting provider. EasyWP, powered by Namecheap, is a great option for beginners. . EasyWP offers three hosting plans—Starter, Turbo, and Supersonic—each designed for different levels of blog growth. The Starter plan is ideal for beginners, offering 10 GB storage and support for up to 50,000 monthly visitors at a budget-friendly price. It’s perfect if you’re just launching your blog and want a simple, affordable option to get started.
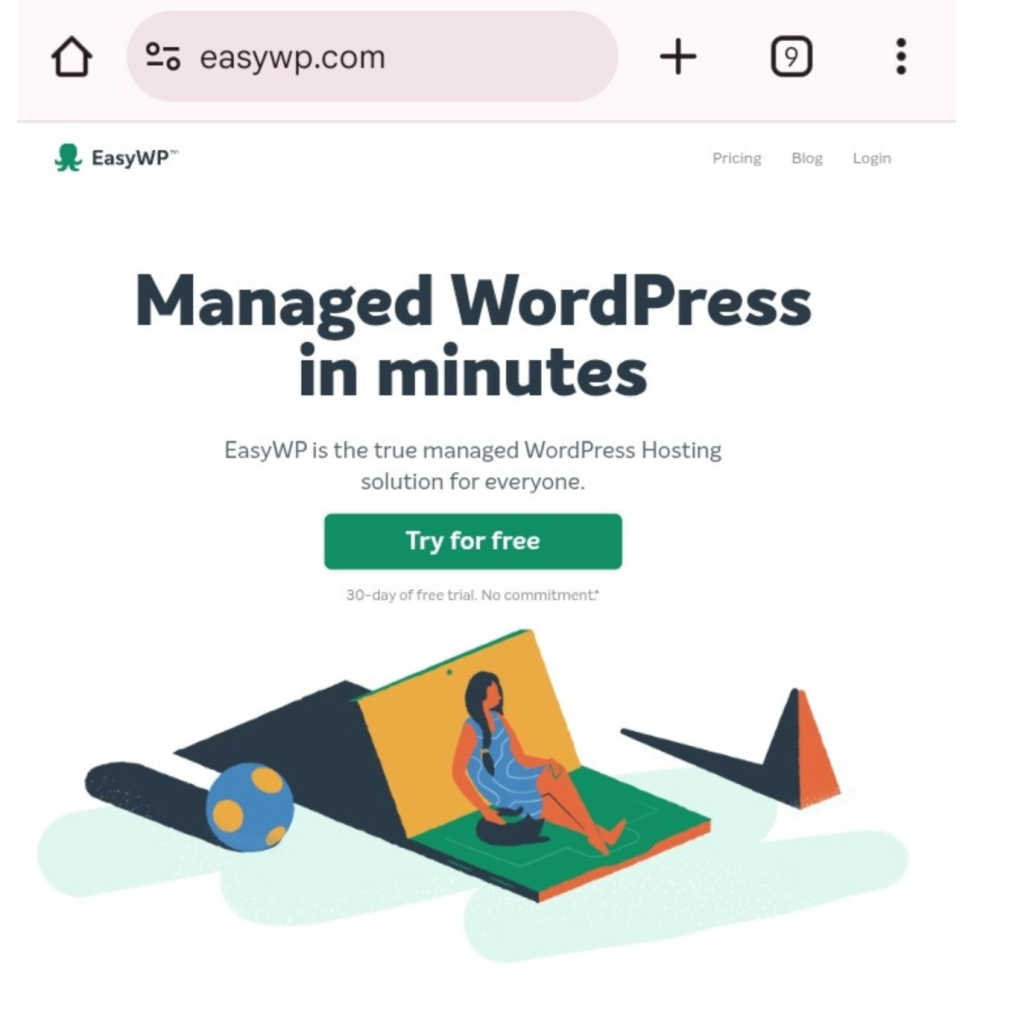
As your blog grows, you can upgrade to the Turbo or Supersonic plans for better performance and more resources. Turbo offers faster speeds and more storage for up to 200,000 visitors, while Supersonic is best for high-traffic blogs with up to 500,000+ visitors. Choosing the right plan depends on your current blog size, expected growth, and need for speed and reliability.
Pairing your domain gotten from Namecheap with EasyWP gives you fast, secure, and fully managed WordPress hosting optimized for performance. With one-click WordPress installation, automatic backups, and scalable plans, EasyWP lets you focus on creating content without worrying about technical setup. Since both services are from Namecheap, integration is smooth, making it easier to launch and run your blog all in one place.
Design Your Blog
Once WordPress is installed, it’s time to design your blog. Here’s how to do it:
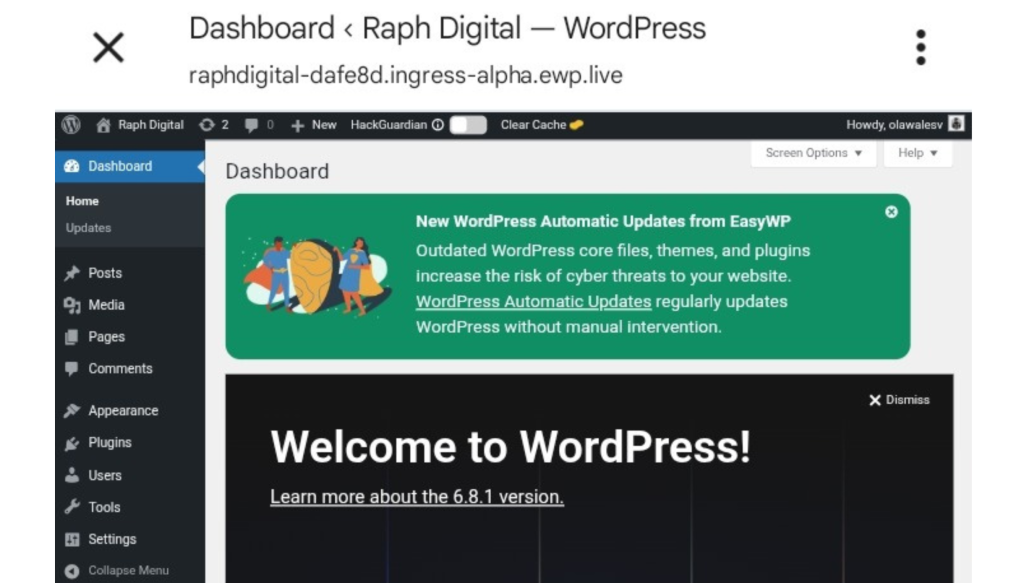
1. Pick a Theme
Pick a theme that fits your blog purpose and style. You can get a theme for your blog directly from your WordPress dashboard by going to Appearance > Themes > Add New. Where you’ll find thousands of free, secure themes.
For more customization, you can explore premium themes from trusted marketplaces like ThemeForest, or use popular freemium themes such as Astra, Neve, or OceanWP that offer both free and paid options. For more advanced design features, platforms like Elegant Themes (Divi) are also available. If you’re just starting out and using your phone, it’s best to begin with a lightweight free theme from the WordPress directory.
How to install a theme and activate
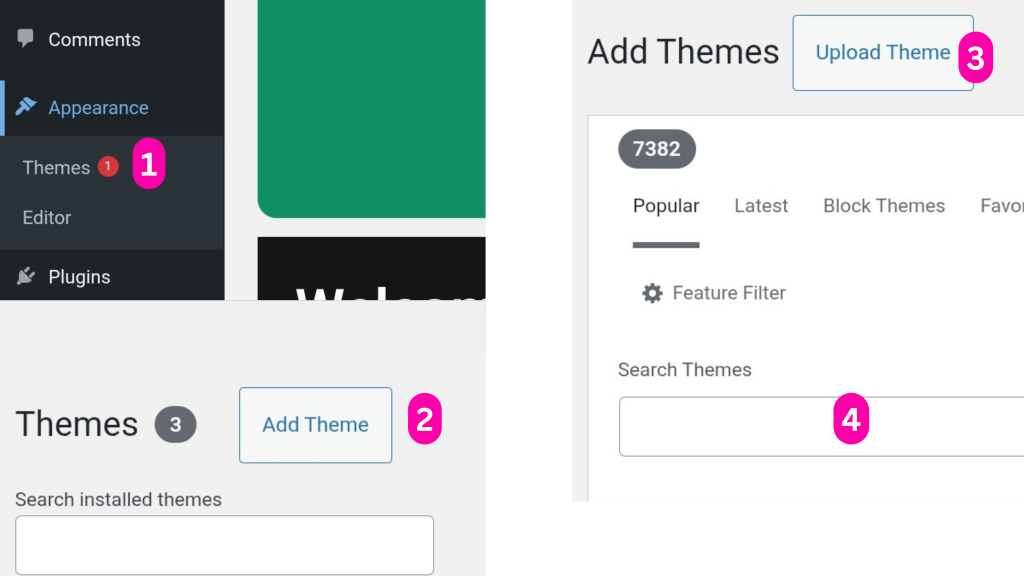
Go to Appearance > Themes – In the left-hand menu, click on Appearance then select Themes.
Click Add New – At the top of the Themes page, click the Add New button.
Search or Upload a Theme – Use the search bar to find a free theme from the WordPress repository. Or click Upload Theme to upload a theme ZIP file if you got one from a third-party source.
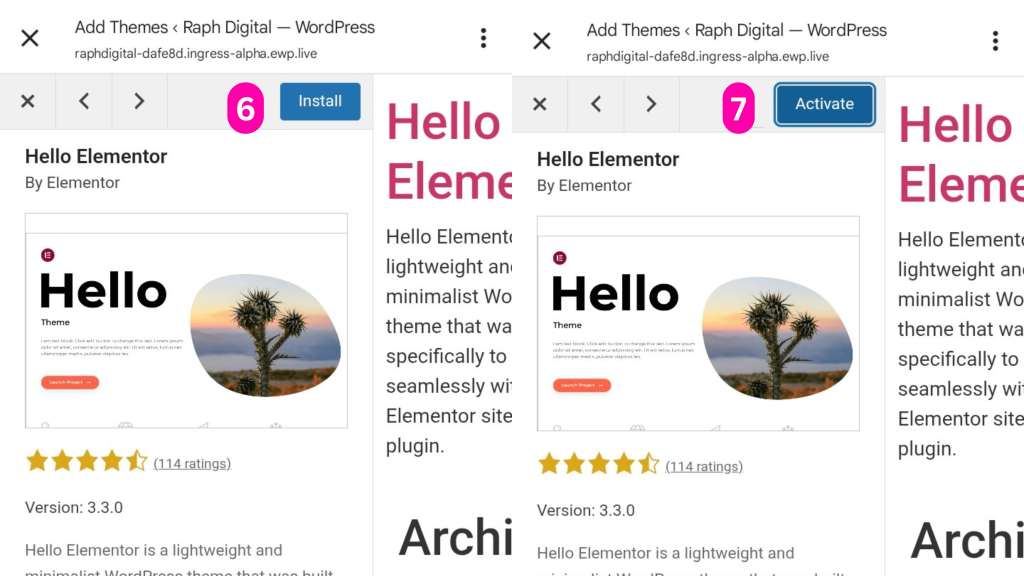
Click Install – Once you find a theme you like, hover over it and click Install.
Click Activate – After installation, click Activate to make the theme live on your blog.
Click Install – Once you find a theme you like, hover over it and click Install.
Click Activate – After installation, click Activate to make the theme live on your blog.
2. Install Necessary Plugins
Installing necessary plugins is important because they add essential features and improve your blog’s performance, security, and user experience without needing to code. Plugins help you optimize your blog for search engines (like Yoast SEO), protect it from spam and attacks (like Akismet and Jetpack), speed up loading times (like LiteSpeed Cache), and add useful tools such as contact forms or social sharing buttons. By using the right plugins, you make your blog more professional, functional, and easier to manage.
How to install and Activate a plugin
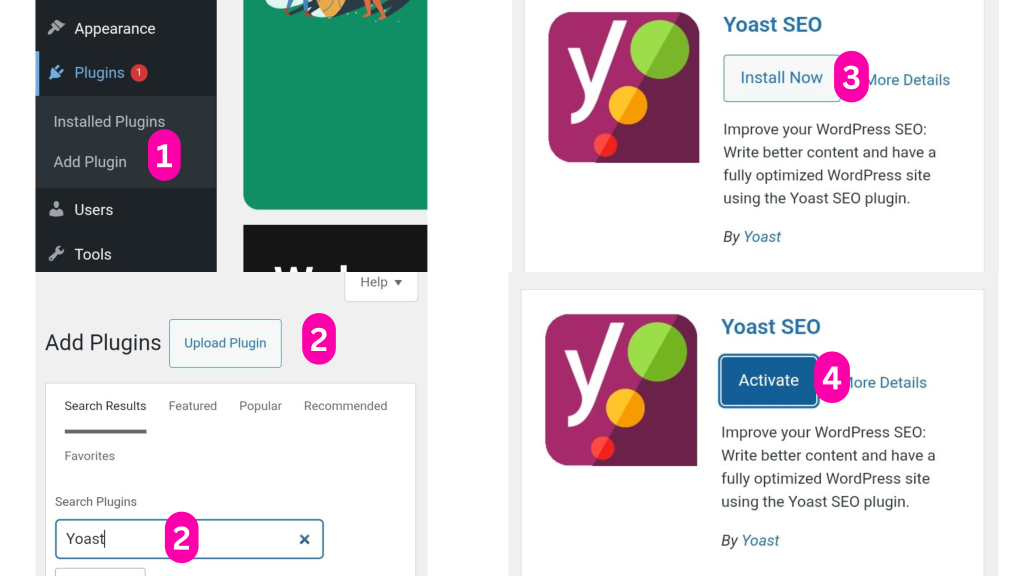
Navigate to Plugins, Add New – From the left-hand menu, click Plugins, then select Add New.
Search for a Plugin – Use the search bar to find the plugin you want (e.g., Yoast SEO, LiteSpeed Cache, WPForms).
Click Install Now – Once you find the plugin you want, click the Install Now button next to it.
Click Activate – After the plugin installs, click Activate to start using it on your site.
3. Create Blog Categories
Organize your blog content into categories from the start. This improves navigation for your readers and boosts your site’s SEO structure. Well-structured categories also make it easier to manage your content as your blog grows. . They also help search engines understand your site structure, which can boost SEO. By planning your categories early, you avoid messy organization later and ensure your content stays focused and easy to manage as your blog grows
How to Create a category
Go to Posts , Categories ‐ In the left-hand menu, hover over posts and click Categories.
Fill in the Category Details
- Name: The title of your category (e.g., Blogging Tips, Fitness, Tech).
- Slug: The URL-friendly version (e.g., blogging-tips). It can be left blank and auto-generated.
- Parent Category (optional): Leave it as None unless you’re creating a subcategory.
- Description (optional): You can add a short description.
Click Add New Category – Once filled out, click the Add New Category button to save it.

4. Create Your Pages
Pages on your blog are meant for static content that doesn’t change frequently, unlike blog posts which are updated regularly. Pages help structure your blog and give important information to your visitors, such as who you are, how to contact you, or what your blog is about.
How to Create a Page
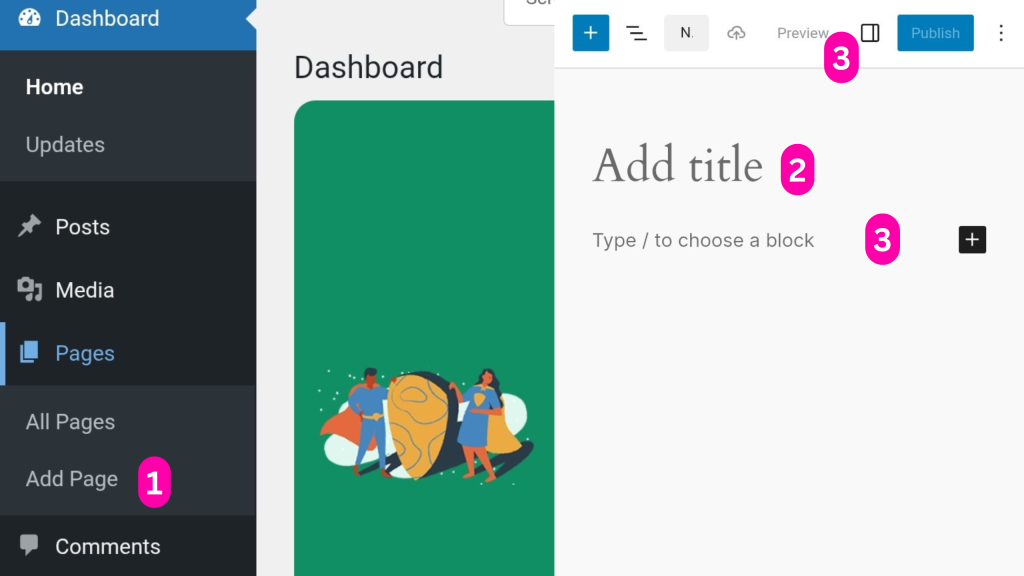
Go to Pages, Add New – In the left-hand menu, click on Pages, then select Add New.
Add a Title – Enter the title of your page (e.g., About, Contact, Privacy Policy).
Write Your Content – Use the block editor to add text, images, headings, or other elements.
Click Publish – Once you’re satisfied, click the “Publish” button at the top right to make the page live.
Write and Publish Your First Post
With your blog setup ready, it’s time to create your first post. Focus on solving a problem or answering a question your audience cares about. Keep it clear, helpful, and easy to read. Use subheadings, bullet points, and short paragraphs. A friendly, conversational tone helps connect with readers.
How to write and publish your first post
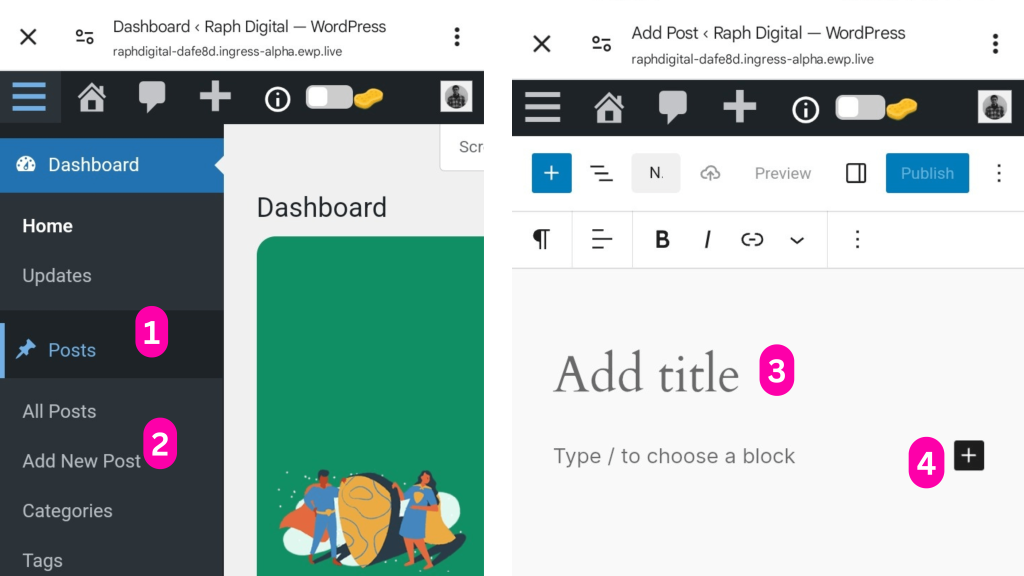
1. Click on “Posts” in the left-hand menu.
2. Click on Add New Post
3. Type in a catchy and relevant title for your blog post.
4. Use the block editor to add text, images, videos, or headings. Break your content into short, readable sections.
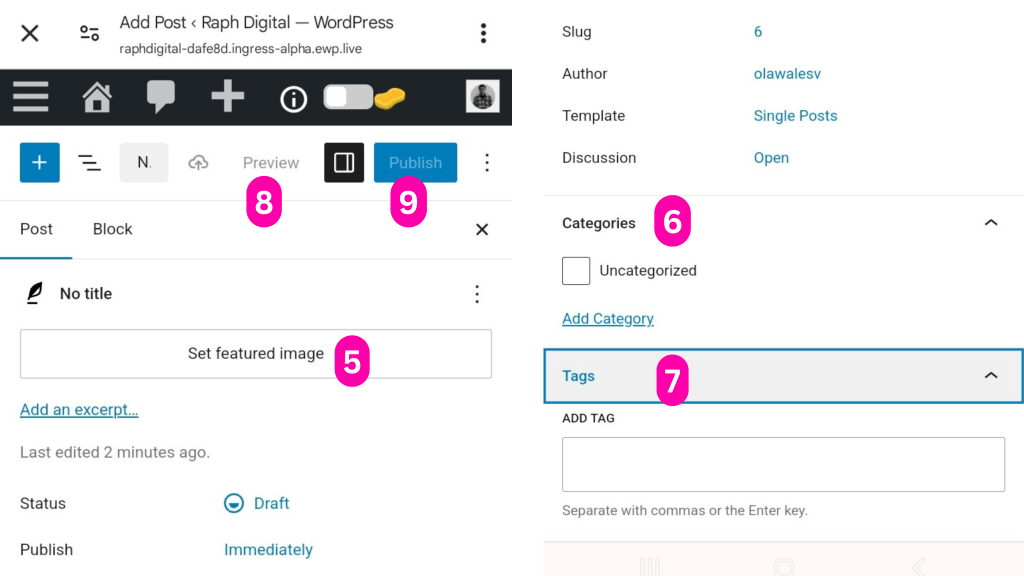
5. Set Feature image, upload an image that visually represents your post. It shows on your homepage and when shared on social media.
6. On the right side, choose or create a category that fits your post topic.
7. You can add tags to describe specific details or topics covered in the post.
8. Click the “Preview” button to see how your post looks before going live.
9. When you’re satisfied, click the “Publish” button at the top to make your post live.
Optimize Your Content for Search Engine Optimization (SEO)
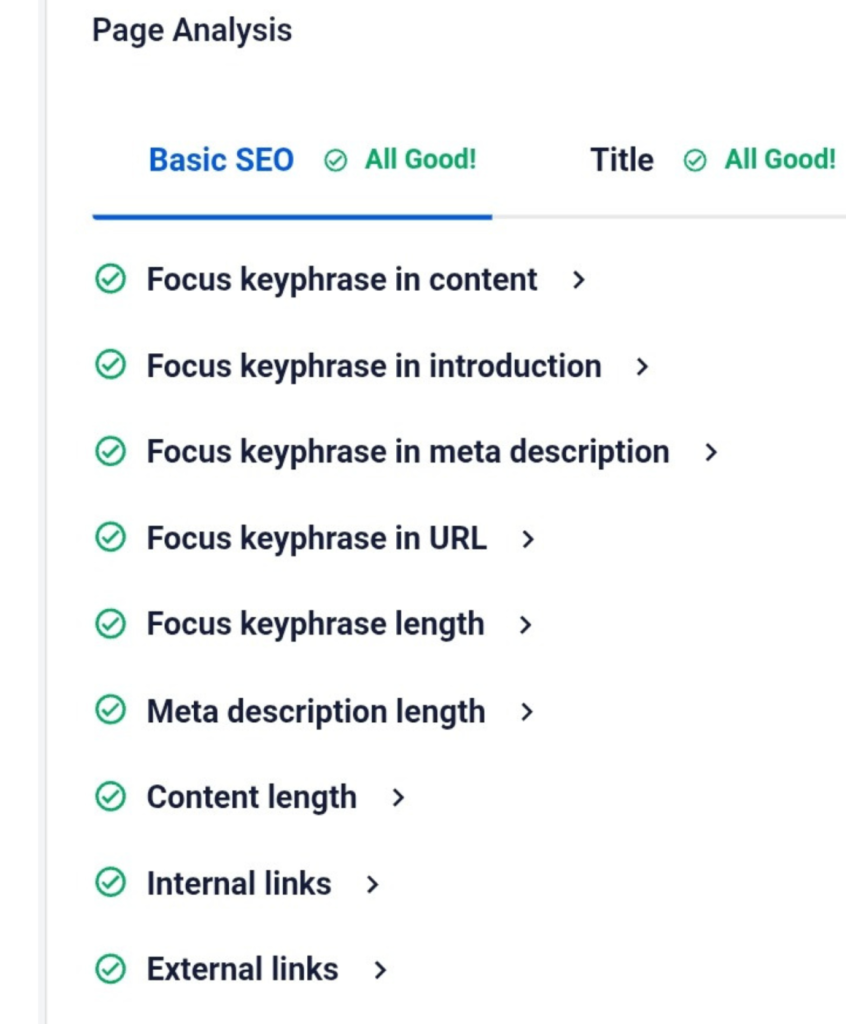
You should optimize your blog content for SEO to increase your visibility on search engines like Google, which helps more people find your blog without paid ads. SEO also improves your content structure, readability, and user experience, which builds trust and encourages visitors to stay longer and return to your blog. Ultimately, good SEO helps grow your audience, authority, and potential income.
Focusing on mobile SEO is crucial because most blog visitors now use smartphones to browse the web. If your blog isn’t optimized for mobile, users may leave quickly, and search engines like Google will rank your site lower. Mobile SEO ensures your blog loads fast, looks great, and works smoothly on all screen sizes.
Promote Your Blog
Promoting your blog is very important, you can promote your blog by sharing posts on social media platforms like Facebook, Instagram, X (Twitter), and WhatsApp using engaging captions and hashtags. Join niche communities such as Facebook groups or Reddit to share your blog where relevant. Use Pinterest to create visual pins that drive long-term traffic, and build an email list with tools like MailerLite to keep readers updated. Collaborate with other bloggers through guest posts or content partnerships, and repurpose your blog content into videos, infographics, or carousels for wider reach and engagement.
Monetize Your Blog
Now that you have promote your blog and have gotten enough traffic, the natural next step is monetization, especially once you start getting consistent traffic. Monetization means turning your blog into a source of income, and there are several proven ways to do this:
- Affiliate Marketing: Promote other people’s products or services and earn a commission when someone buys through your unique link. Great for beginners and easy to start with platforms like Jumia KOL, Amazon Associates, or Expertnaire.
- Display Ads: Join ad networks like Google AdSense or Ezoic to place ads on your blog. You earn money when visitors see or click the ads.
- Sponsored Posts: Brands may pay you to write about their products or services, especially if your blog has a growing audience in a specific niche.
- Sell Digital Products: Create and sell e-books, online courses, templates, or guides related to your niche.
- Offer Services: Use your blog to promote your services (e.g., graphic design, writing, coaching), especially if you have skills to offer.
Consistency and Growth
The final key to success is consistency. Keep publishing new content, update older posts, and engage with your audience regularly. Track your performance and reinvest in improving your blog to build long-term success. Growth takes time but with patience and persistence, your efforts will pay off.
Final Thoughts
Starting a blog using your smartphone is not only possible but also powerful when done right. With the right apps, tools, and mindset, you can create, manage, and grow a successful blog entirely from your phone. Stay consistent, keep learning, and focus on providing value—your smartphone is all you need to start building your online presence today.
Frequently Asked Questions (FAQ)
Yes! With powerful blogging apps, mobile-friendly website builders, and cloud storage, you can manage an entire blog using just your phone.
WordPress is the best option for flexibility and monetization. However, Blogger, Medium, and Wix also offer mobile-friendly blogging solutions.
You can buy a cheap domain name from Namecheap, Bluehost, or Hostinger and get hosting from EasyWP or Hostinger, all from your phone.
No! WordPress and other platforms allow you to create a blog with drag-and-drop tools and pre-designed themes, requiring no coding knowledge.
Use Apps Like:
- WordPress App – For managing your blog and publishing posts.
- Google Docs or Notion – For drafting and editing posts.
- Canva – For creating featured images and social media graphics.