How To Start a Blog For FREE Using Your Smartphone In 2025: A Step-by-Step Guide.
Starting a blog is one of the best ways to share your knowledge, express your creativity, and even make money online. Whether you want to write about personal experiences, business tips, or hobbies, blogging offers an excellent platform to reach a global audience.
This article will show you how to launch a blog using only your smartphone, step-by-step, and with style. Additionally, you will receive $60 worth of free resources to help you launch your blog. Don’t skip any steps and read all the way through.
1. What is a Blog
A blog is an Article or Write-up where an individual, group, or business regularly publishes written content in the form of articles, known as blog posts. Blogs can serve various purposes, including sharing personal experiences, educating readers, providing news, or promoting products and services.
Blogs are typically organized in reverse chronological order, meaning the latest posts appear first.
In 2025, Blogging remains a powerful tool dedpite the rise of social media, video content, and AI-driven platforms.
Here’s why:
- People still search Google for answers to their problems, and blogs provide in-depth, well-structured content compared to short social media posts or videos.
- Unlike social media posts that disappear quickly, blog posts rank on Google and bring consistent traffic over time.
- Monetization opportunities are expanding such as affiliate marketing, Google AdSense, and selling Digital Products.
Also, Mobile technology has advanced to the point where smartphones in 2025 are capable of handling all aspect of running a blog, from writing and editing to SEO optimisation and promotion.
This article will enlighten you how to create your first blog with just your smartphone and publish it, so keep calm and stop doubting if your phone can handle the whole process.
2. Choose a Niche
The first step to take in creating a blog is to choose a niche. This is a specific topic or area of focus that your blog covers. Instead of writing about everything, a niche helps you target a specific audience interested in a particular subject.
Readers are more likely to follow your blog if it consistently provides valuable content in a specific area. Most businesses prefer advertising or partnering with blogs that have a clear target audience.
3. Domain Name and Hosting Platform
The next important step is to choose a domain name and Hosting platform. If you decide to use WordPress.org (the self-hosted version) for your blog, you will need two important things to make your blog live on the internet:
- A Domain Name
- An Hosting Plan
What is a Domain Name?
A domain name is simply your blog’s address on the internet, like www.yourblogname.com. It is what people will type in their browser to visit your blog.
Your domain name should be:
- Short and easy to remember
- Related to your niche
- Easy to spell and pronounce
- Preferably end with .com (or other popular extensions like .net, .blog, or your country extension e.g., .ng)
You can buy domain names from platforms like:
- Namecheap
- GoDaddy
- Google Domains
These platforms allow you to buy domains easily using your smartphone.
What is Hosting?
Web hosting is the service that stores your blog and its content (text, images, videos, etc.) and makes it available online. Without hosting, your domain name would lead to nowhere.
Think of hosting as the “house” where your blog lives, while the domain is the “address” to the house.
Affordable and beginner-friendly hosting providers include:
- EasyWP (Recommended for mobile users)
- Bluehost
- Hostinger
- Namecheap Hosting
These platforms offer simple and mobile-friendly dashboards, making it easy to manage hosting directly from your smartphone.
Steps to Get a Domain Name and Hosting For FREE (Using Your Smartphone)
EasyWP will be used to obtain our domain name and hosting in order to fulfil the goal of this post, which is about “how to start a blog for FREE with your smartphone…” The reason is that when you select the starter subscription, EasyWP will give you a free domain and free hosting for the first month. After that, you will have to pay $6.88
Step 1
- Head on to Namecheap.com, and login to your account or create one if you don’t have.
- Click on the three horizontal line at the right top corner as shown in the image below.
- Toggle on WordPress and click on Managed WordPress Hosting.

Step 2
- Click on try for free
- Toggle on the payment method
- Input your card details if you are using your card to make payment
- Confirm your payment
- You will only be charged after your free trail has ended.

Step 3
- You will be directed to EasyWP dashboard
- Enter your blog or website details and continue with the procedure to create a free blog

4. Install WordPress
The next step is WordPress installation. Here, you don’t need to install WordPress manually. It has been made simple by automatically installing WordPress after creating your website , which you can access from your EasyWP dashboard, or your email since you use EasyWP for both domain name and hosting.
After creating your blog EasyWP will send your credentials such as username, password and link to your email which you can use to access your WordPress Dashboard.

5. Customize Your Blog
Another important key features of your blog is customization. Once your domain and hosting are set up, the next step is to customize your blog, and design it to make it visually appealing and user-friendly.
But first you need to get access to your WordPress dashboard.
To get access to your WordPress dashboard from your Namecheap account:
- Go to your browser settings and turn on Desktop mode
- Go to apps section from your Namecheap account dashboard
- Click on EasyWP app and login with your namecheap account

From your EasyWP Account:
- To access your WordPress dashboard from EasyWP, click on WordPress icon close to settings.
From your email:
- check your email for your login or credentials details.
Make sure you turn on Desktop mode from your browser settings to view the entire page of your WordPress dashboard

Steps to Customize Your Blog
1. Theme and Plugin Installation
A theme controls the look and layout of your blog. Since you’re blogging from a smartphone, you need a responsive and lightweight theme that loads quickly and looks great on all devices.
Now that you have downloaded the theme let’s begin with the installation process
- Navigate to your appearance menu on your WordPress dashboard
- Click on theme, add new theme, upload theme, and install the theme file you downloaded
- After installing your theme click on activate
- Install and activate the required plugins
- Unmarked the twitter plugin if there is an error installing the plugins

2. Import Demo
This allows you to quickly set up a professional-looking blog by importing pre-made website designs (demo content) instead of designing from scratch. This is useful if you’re blogging from a smartphone, as it saves time and effort.
To import demo from the themes option
- Navigate to innovation from your dashboard
- click on demo importer
- Import any demo you like or that suits your blog niche.
- Click on save changes

Before and after importing demo content

3. Customize Your Theme
This allows you to modify your blog’s design, layout, colors, fonts, and other visual elements to match your style. It allows you to personalize your blog without coding, making it look unique and professional.
How to customize your theme
Step 1
- Navigate to your theme options (Innovation)
- Click on each properties to edit, remove, change, and customize.
- Save changes when finish Customizing

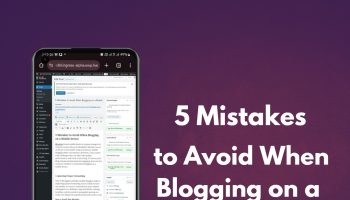
6. Write and Publish Your First Blog Post
Now that your blog is set up and customized, it’s time to write and publish your first blog post. This step is essential because content is what attracts readers and keeps them engaged.
Know that the demo content you imported includes dummy post content on your blog. You can decide to delete all of them and start adding new post or you edit each post one after the other.
Steps to publish your first blog post
- Open your WordPress Dashboard
- Write your Blog Post
- Add Images and media
- Optimize for SEO
- Preview your post
- Publish Your blog post
How to add a new post from your dashboard
- Navigate to post menu from your WordPress dashboard
- Add new post
- Add your title, and choose a block to write the content for your post
- Publish Your blog post.
![]()
7. Optimise Your Content for SEO
If you are not optimising for search engines, even the best content in the world will fall short. Avoid keyword stuffing and use a good keyword strategically throughout your post to start optimising your content. Additionally, make sure you’re using headlines correctly, include all tags in your images, and write simple and interesting paragraphs.
Also, since they improve search engine visibility, pay special attention to on-page SEO components like titles, permalinks, and meta descriptions.
Lastly, keep in mind that over half of all internet users use smartphones to access the internet, so make sure you’re concentrating on mobile SEO. In addition to your selected SEO plugin, think about using a quality SEO tool, like AIOSEO, to help you stay on top of things.
8. Monetize Your Blog
After you’ve built a strong foundation and followers, you can start making money from your new blog. In order to generate income based on clicks or impressions, one well-liked strategy is native advertising, which allows you to place sponsored posts or advertisements anywhere on your blog.
Affiliate marketing is an additional choice, in which you market goods or services in exchange for a commission on each sale. To give your audience value, keep in mind that selecting affiliate relationships that fit your niche is crucial. A good affiliate marketing plugin can also be used to hide unsightly links, provide access to reporting, or give discounts on products that have been purchased.
9. Practical Aspects Of Blogging
Blogging goes beyond just writing posts, it involves several practical aspects that ensure your blog runs smoothly, attracts readers, and stays relevant. Here are the key practical elements you should consider when writing a successful blog:
- Content Creation
- Blog Design & Customization
- Audience Engagement
- Monetization Strategies
- Blog Maintenance & Security
- Analytics & Improvement
10. Final Thoughts on how to Blog with your smartphone.
Starting a blog in 2025 using just your smartphone is not only possible but also easier than ever. With powerful mobile apps, cloud-based tools, and AI-assisted content creation, you can run a successful blog without needing a laptop.
Here’s a quick recap of what you need to do:
- Choose Your Niche – Focus on a specific topic to attract the right audience.
- Get a Domain & Hosting – Use services like Namecheap, Bluehost, or Hostinger for a professional setup.
- Set Up WordPress – Install a mobile-friendly theme and customize it to match your brand.
- Write & Publish – Create valuable, SEO-optimized content consistently.
- Monetize Your Blog – Use affiliate marketing, ads, sponsored posts, or digital products to generate income.
With dedication and consistency, your blog can grow into a profitable online platform—all from your smartphone.